


Getting Started With Jupyter Notebook.
Building the Foundation: Setting Up Your Python Environment.


Harnessing the power of data has become increasingly important in today's data-driven environment. Having a strong and well setup Python environment is essential to success in this industry, regardless of whether you are an experienced data scientist or are just starting.
We will walk through the crucial steps of setting up a Python environment, specifically Jupyter Notebook in this article. We'll go over everything, including choosing the best Python distribution, managing packages, setting up integrated development environments (IDEs), and carrying out basic data operations. By the conclusion, you'll have a clear plan for setting up a jupyter notebook that enables you to effectively explore, analyze, and display data.
JUPYTER NOTEBOOK.
As emphasized earlier, Python is a popular choice for data science, machine learning, and scientific computing, due to its rich ecosystem of libraries and tools. One of the most cherished tools in the Python data science toolkit is Jupyter Notebook. It provides an interactive environment that allows you to write and execute Python code in a user-friendly and flexible way. Here's a quick guide to help you get started with Jupyter Notebook using an underlying framework called Anaconda:
GETTING STARTED
Step 1: Install Anaconda:
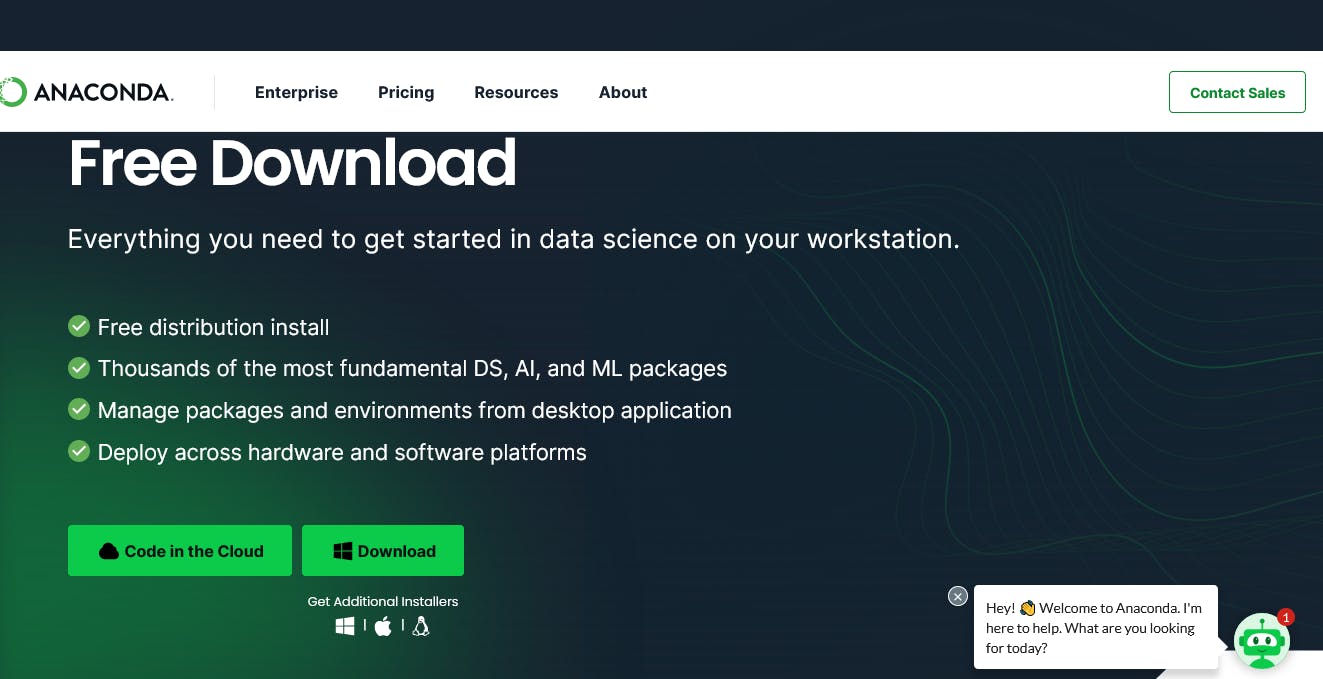
Visit the official Anaconda website at https://www.anaconda.com/products/individual,
an interface like the image below appears.
Ensure that you download the version suitable for your operating system (Windows, macOS, or Linux). Anaconda offers separate installers for each.
After downloading it, we will then install it.
Step 2: Launch Jupyter Notebook
To get started with jupyter notebook, we go to our command prompt or terminal.
We then type Jupyter Notebook, and we press the
enterkey.This is going to start up Jupyter Notebook in the prompt and open it up inside one of our browsers.
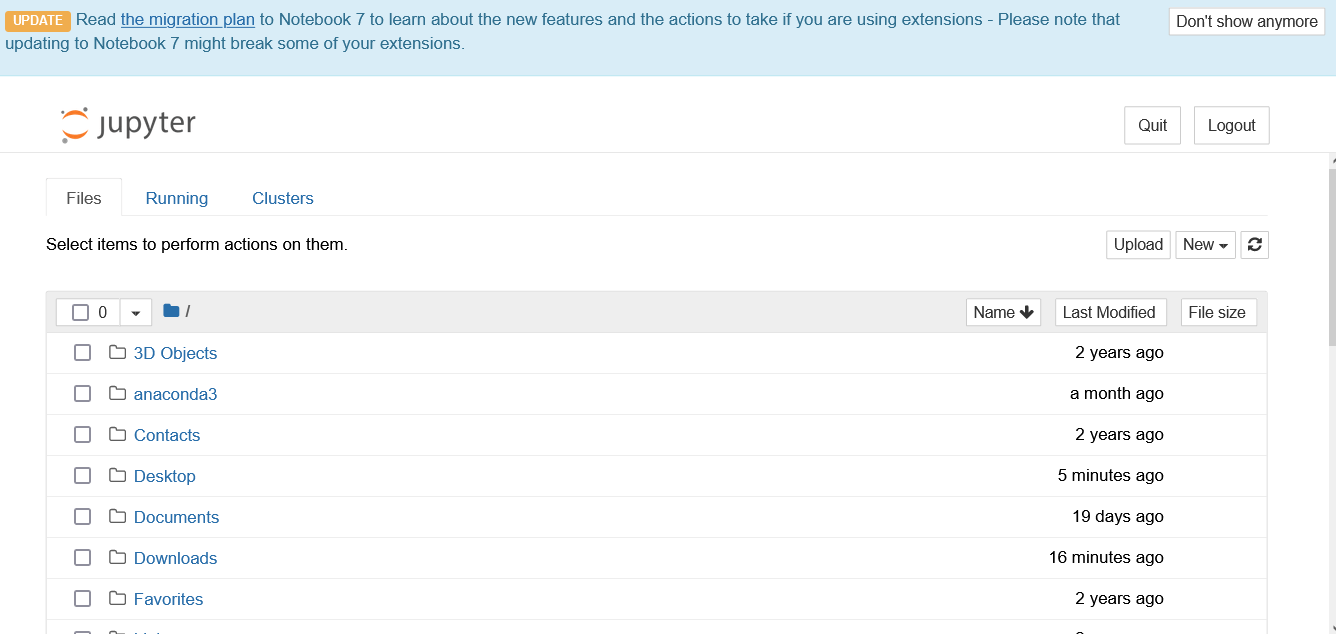
- It then brings up an interface as seen above, which shows all the files in our current directory. On this interface, you are also going to see notebooks and terminals that are running at that instant in time.
Step 3: Create A New Jupyter Notebook.
we can see the two buttons:
UploadandNewon the top-right of the interfaceTo create a new jupyter notebook, we simply click the
Newbutton.
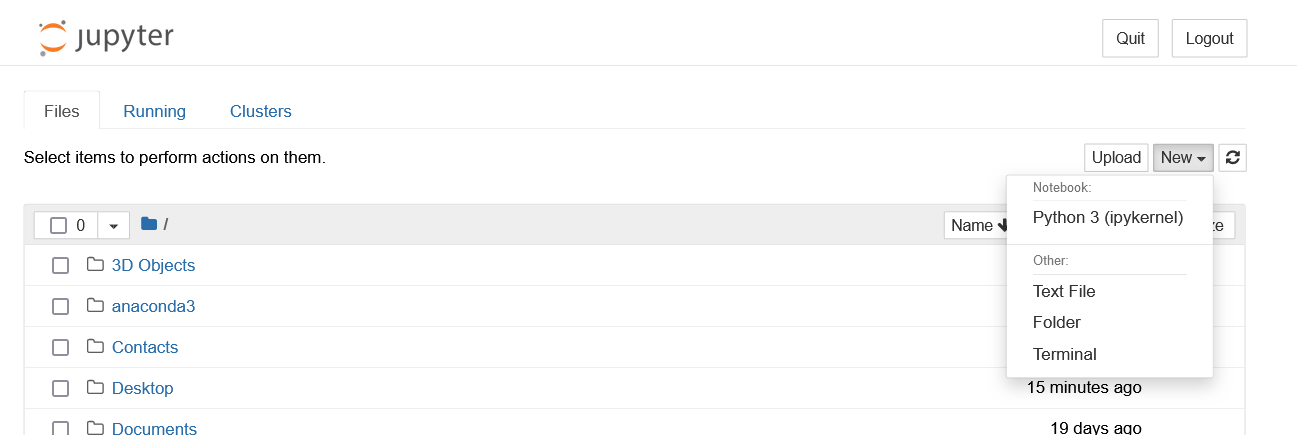
When we hit the
Newbutton, a dropbox containing different elements is dropped.we then click on the
Python 3(ipykernel)button, which then opens up a new jupyter notebook.
Step 4: Write Your First Python Code
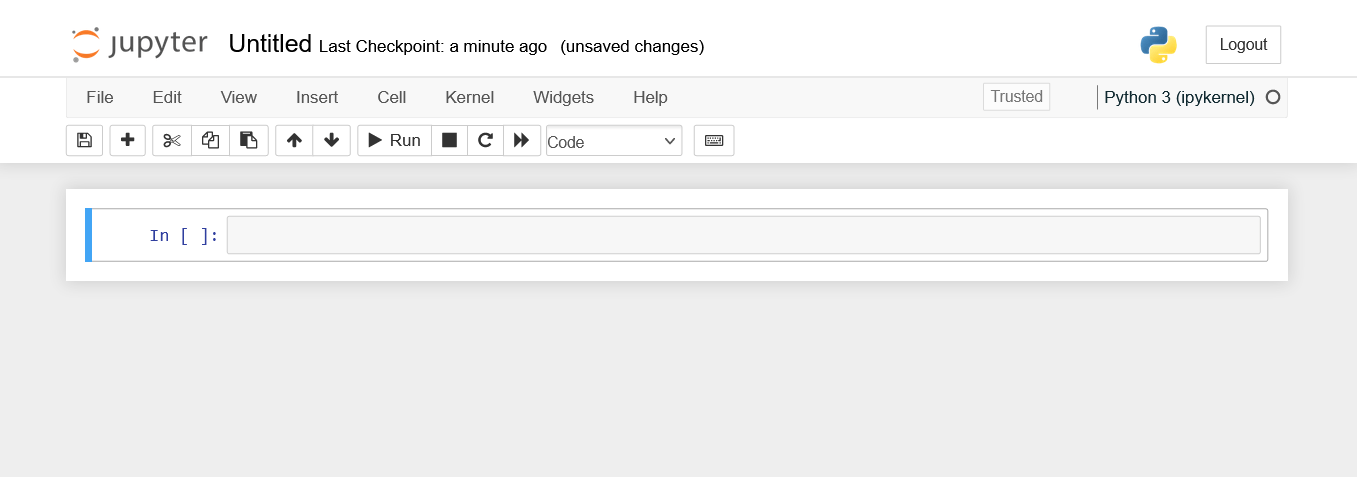
So we are going to write our first Python "hello world".
To get started, we simply click on the single cell right there. The cell turns from blue to green.
We then write "
print('Hello World')", and then we hit therunbutton or click onshift+enterkeys on our keyboard to run the code.
Step 5: Getting familiar With The Jupyter Environment.
Each of the boxes we run in our code is called a cell.
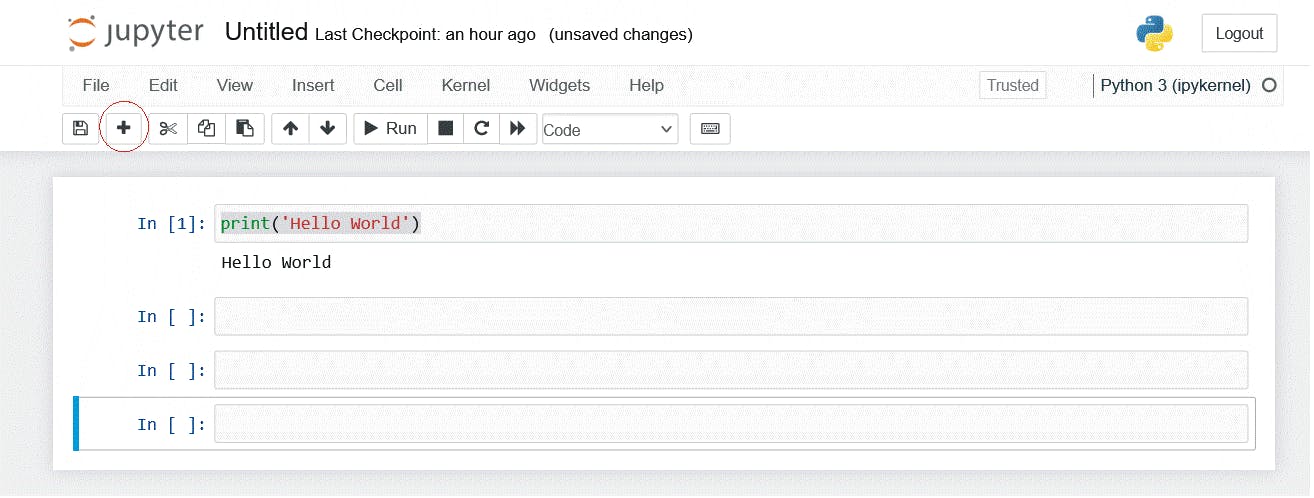
To add a new cell, we simply click on the + icon.
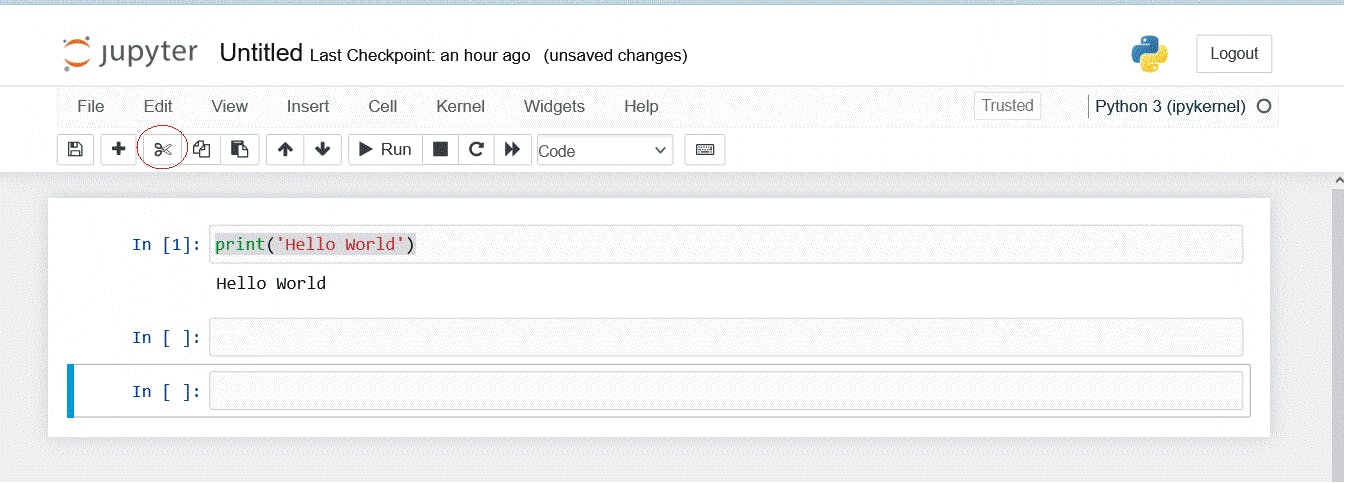
- To delete a cell, we simply hit the scissor-looking icon, beside the + icon
We could also use shortcuts: to delete a cell, we hit the
dkey twice. To create a cell, we hit theakey once.It's important to note that when a particular cell is active, it is green in color in contrast to the blue color in the cell above. To use shortcuts, we hit the
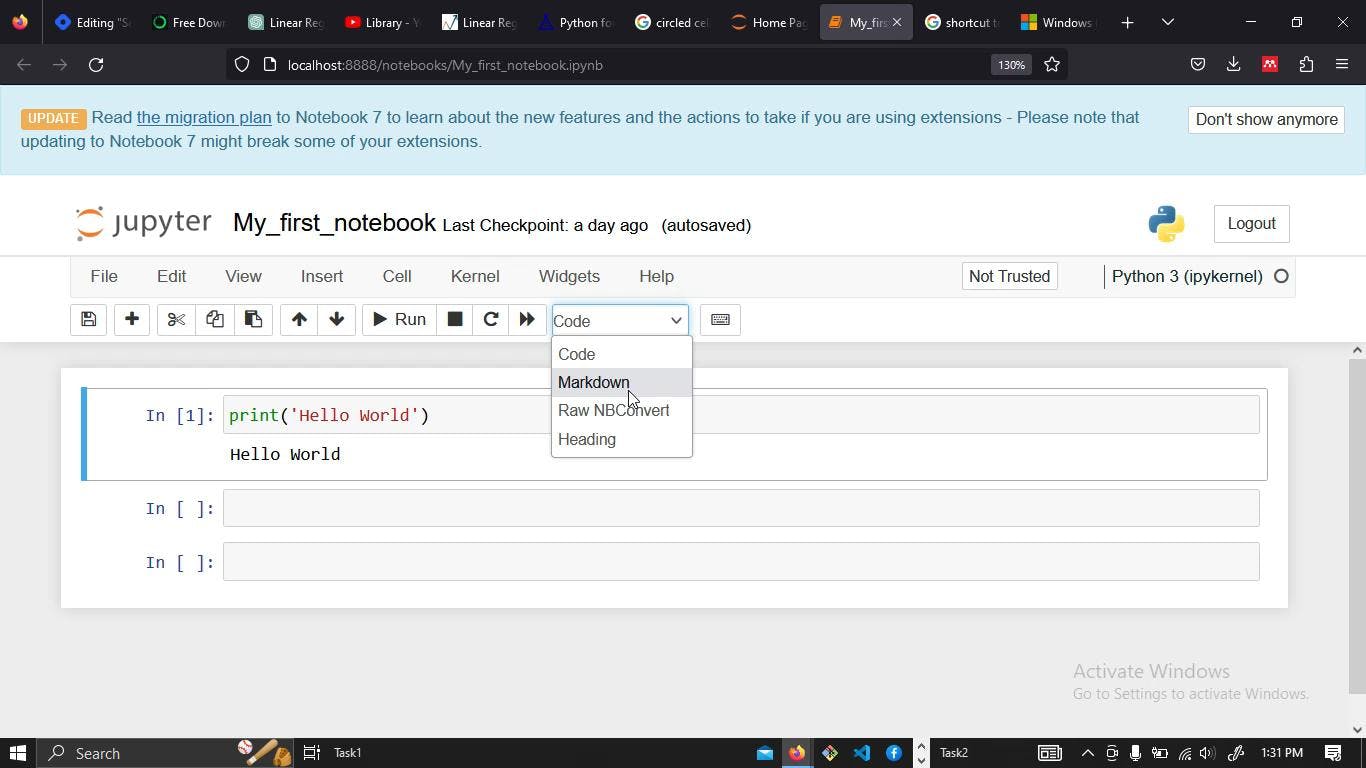
escbutton on our keyboard, which takes the cell back to its default blue color.Now all along, we've been working with a code cell. We can change any cell to a markdown cell by hitting the
codedropbox and selecting markdown.
Markdown is a plain-text formatting language used for easily structuring and styling text. It is also a way of adding commentary to our code.
Conclusion
In this guide, we've sojourned on a journey to explore the incredible world of Jupyter Notebook. We've learned how to install it, create and run code cells, and add markdown—all within the same interactive environment.
So, embrace Jupyter Notebook's power. Use it to find solutions, make data-driven tales, and rekindle your enthusiasm for coding and discovery. Jupyter Notebook welcomes all users, novice or expert, to a world of limitless possibilities.
Happy coding!